Week 1 Outline: Introductions & Command Line Basics
Student and instructor introductions
Command Line Basics
While the terms “command line,” “terminal,” and “shell” are sometimes used interchangeably, each has a slightly different denotation.
“Command line” has the broadest scope, referring to a style of interface. A command-line interface, also known as a command-line interpreter (CLI) is any system in which all interaction occurs via text-based commands issued through a keyboard.
A terminal, also known as a terminal emulator, is an application in your local operating system that provides a window to type in. We’ll be using the built-in macOS terminal emulator, called Terminal, which you can find under “Utilities” in your Applications folder (/Applications/Utilities/Terminal.app). Open Terminal, then type the following and press return. (Note that there is a space after echo.)
echo $SHELL
A shell is the software layer between user input and the rote world of file system maintenance. The graphical user interface (GUI) provided by Mac OS X is itself technically considered a shell, but if someone refers to “the shell” they typically mean a command-line interpreter like Bash. The command you entered above should have returned /bin/bash, which is the location of Bash’s “binary,” or machine-readable application file. If you open a command-line session on a remote server, your text input will be handled by the shell installed on that server.
It is important to understand that both Mac’s GUI (known as Aqua) and Bash are rooted in the same set of underlying OS services. Since the introduction of OS X, and now in iOS as well, these core utilities have been handled by a Unix-like operating system called Darwin, which is based on the famously stable Berkeley Software Distribution (BSD) version of Unix.
Exploring the File System
Interacting with the Mac file system from the shell: Create a new terminal window by pressing ⌘+N. Before we go further, you may find it helpful to pull up the following cheat sheet: Unix/Linux Command Reference.
Unix-like operating systems are based on a metaphor: a nested set of directories and data files, forming a tree structure that begins at the root directory /. A benefit of this arrangement is that each file can be uniquely identified using a pathname of the following format:/Users/yourname/Desktop/file.txt.
At any given moment in a shell session, the user occupies a particular “working directory” within this tree structure. Enter the command pwd (“print working directory”) to see your current location.
pwd
The root directory, /, is just like any other folder in the system. Enter the following to change your working directory to root.
cd /
You can view the contents of the current directory with the ls command.
ls
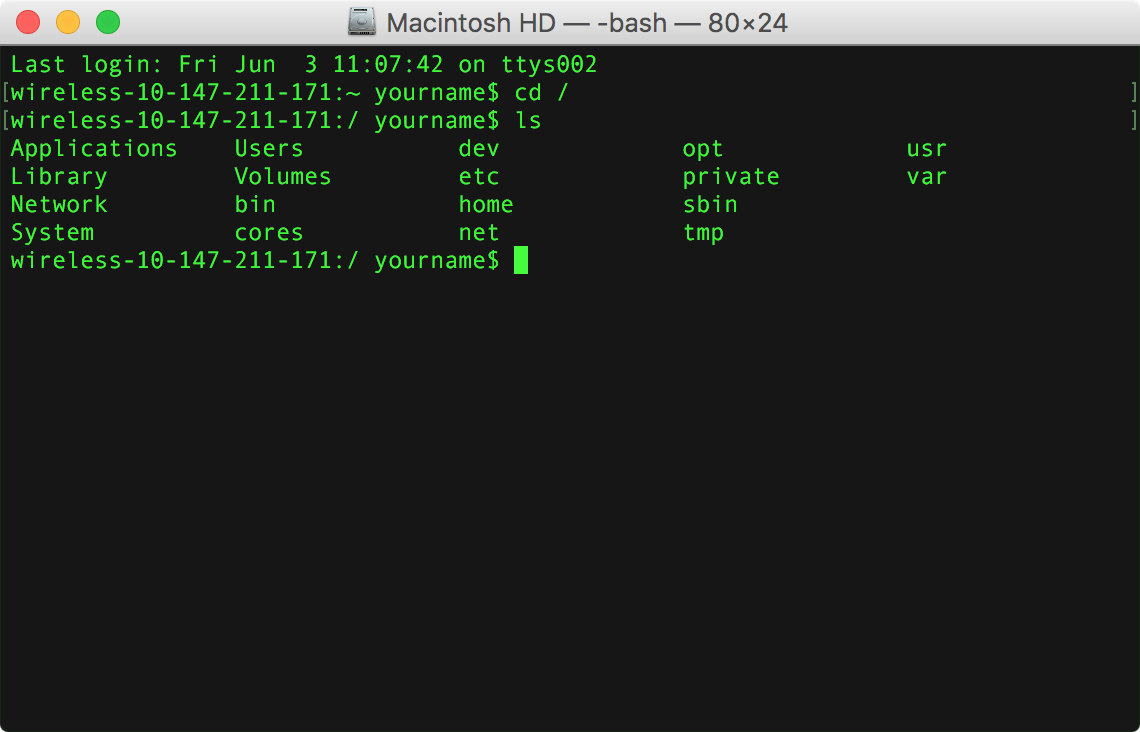
You should see a list of directories including “Library,” “Users,” “bin,” “dev” and so on. Add the -a option and you’ll see a longer list that may include hidden files beginning with .. You can find dozens of other options in the ls manual, which you can read using the following line. Press “q” to return to the shell.
man ls
Tip: Hold down the Option key and click within the current line to change the position of the cursor.
Command Line Basics Continued
Next, create a new directory and text file in our shared folder. We’ll spend more time working with text data after the break.
cd ~/Desktop
mkdir test_dir
echo "This is some text." > test.txt
To move our text document into our directory we can use the mv tool. We’ll then cd into the folder.
mv test.txt test_dir
cd test_dir
Tip:
cdinterpretstest_diras a relative file path in the above lines. Because a folder with that names is indeed present in the working directory, we can refer to it by its local name rather than its full pathname beginning with/.
Make a copy of our text file with cp and check the updated directory contents.
cp test.txt test2.txt
ls
Tip: If you’re midway through typing the name of a pre-existing file in the shell, you can press tab to complete the filename automatically.
Rename our new text file with the mv command, then view the contents of the current directory with ls.
mv test2.txt test3.txt
ls
Next, delete the file we just created using rm.
rm test3.txt
Another useful file path shortcut is ../, which refers to the parent directory of our current location on the file tree. Use it to cd back to Desktop.
cd ../
Finally, we’ll delete our test directory and the file it contains. Adding the -r option tells rm to remove files recursively, meaning everything in the specified folder will be destroyed.
rm -r test_dir
Be careful with rm, especially in recursive mode. It deletes files permanently rather than sending them to a Trash folder, so a small mistake can really ruin your day.
Text I/O from the Command Line
Below, we write a text file in the Desktop directory using the > operator. We then append a second line using >> and list the contents of the Desktop to confirm we’ve created a new file.
Tip: If
>is directed at an existing file, it will overwrite the original without warning.
cd ~/Desktop
echo "Hello there." > note.txt
echo "Hello again." >> note.txt
ls
If we want to view our new text file, we have lots of options to choose from. By default, head will read the first 10 lines of a text file and print them in the shell. You can specify any number of lines with the -n option.
head note.txt
head -n 1 note.txt

tail is similar, printing a file’s final lines instead.
tail note.txt
tail -n 1 note.txt
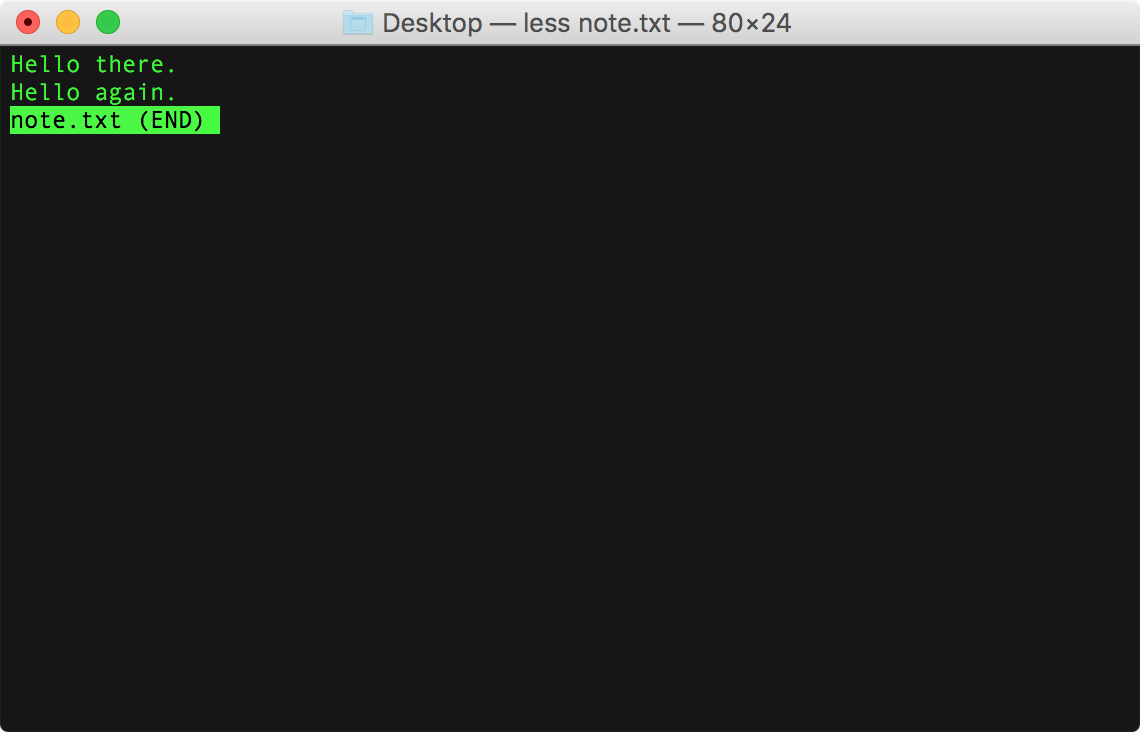
less is a program that lets us scroll through long text files. To close less when you’re finished, press the q key.
less note.txt
Nano is a simple text editor that is available in most Unix-like systems.
nano note.txt
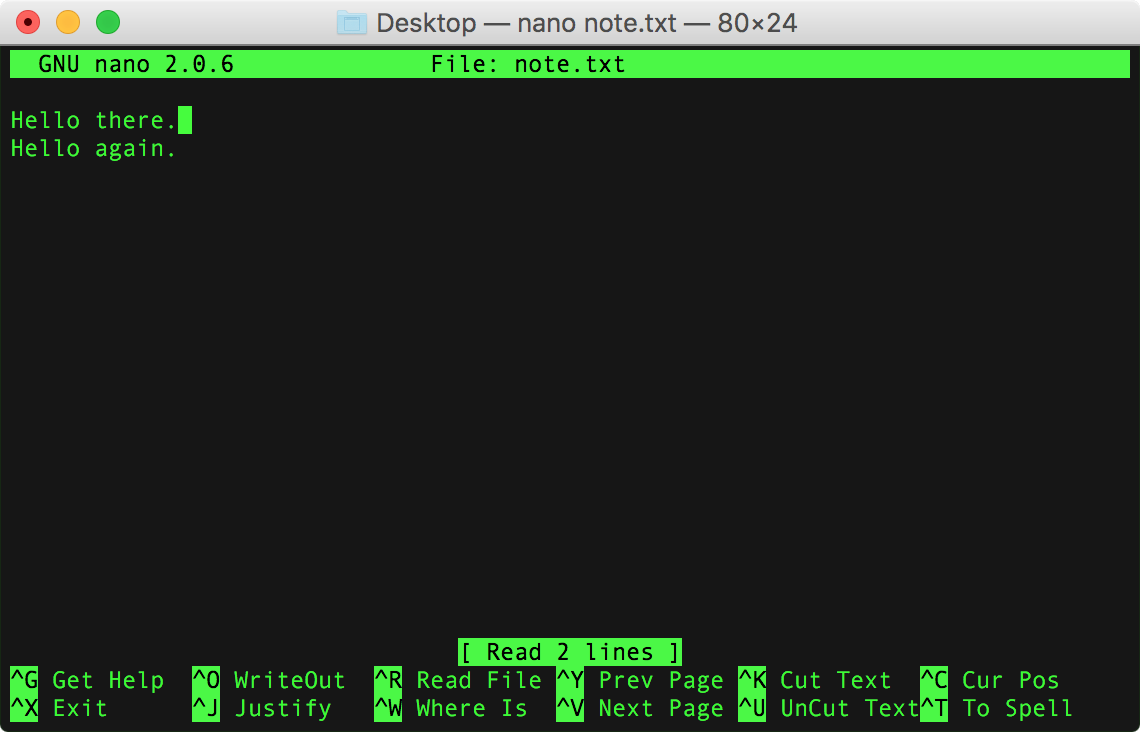
Use the arrow keys to move your cursor around in the document. Add another line to the file and save it by pressing ctrl+O (the letter ‘O’), followed by return to confirm the filename. Press ctrl+X to exit Nano.
Using Docker
We have been using the bash shell in macOS to learn some basic command-line vocabulary. All operating systems are different but we want everyone to use the same kind so we will use Docker. Docker is an application that makes it possible to run a virtual copy of the Linux operating system within your primary OS. We will be using Ubuntu, a version of Linux that is often used to run web servers. Ordinarily, you would launch an Ubuntu server and then install the programs you need, one by one; Docker lets us speed up that process by defining our system’s initial configuration in a plain text file, known as a Dockerfile. You can view the Dockerfile we are currently using here.
For more details on how Docker works, see this overview.
How to use Docker from the iSchool Macs (in the classroom and in the lab):
-
Open a new terminal window.
-
Enter the following command in the terminal window to download the Docker image files we’ll be using. This could take several minutes.
docker pull pcda17/ubuntu-container
- When the download is complete, enter the following command to run the container. This will create a new directory called
sharedfolderon your desktop.
docker run --name pcda_ubuntu -ti -p 8889:8889 --volume ~/Desktop/sharedfolder/:/sharedfolder/ pcda17/ubuntu-container bash
The command above includes several options:
- The
--nameflag sets the name of our container aspcda_ubuntu, while-titells Docker that we want to use an interactive terminal. -pmaps port 8889 in our container to port 8889 in our local OS (more on this later).- The
--volumeoption defines a “shared volume” between the container and our local machine, a directory calledsharedfolder. pcda17/ubuntu-containeridentifies the image we want to download, which is hosted on the Docker Hub website.- Finally,
bashspecifies that we want to enter the bash shell.
You should now be in an interactive bash session in your new Ubuntu container. To make sure, type the following command and press enter to see your username. The response should be root.
whoami
Now enter the command pwd to print the current working directory. You should be in /sharedfolder/.
pwd
Create a new text file, just like we did earlier in the macOS shell.
echo "Hello!" > sample_file.txt
Open the sharedfolder directory on your desktop, and you should see the file we just created, sample_file.txt. The sharedfolder directory is like a portal between Ubuntu and your primary OS; both can read and write files located there, and any changes you make will instantly be visible in both operating systems.
Download a web page from the command line
Enter wget followed by any URL to download the web page or file at that URL. Try it with Google’s home page.
wget http://google.com

If you’re connected to the Internet, you should see feedback in the shell that looks something like the above. In this case, Wget has saved Google’s “index.html” file to the desktop. Either view the file in the shell using less or open it in your text editor.

To make the file more readable in Atom, go to the toolbar and select View > Toggle Soft Wrap.
Wget is an amazingly versatile tool, and we will use it many times in this course. Enter the following command to view Wget’s user manual.
man wget
Download a video with youtube-dl and create an excerpt with FFmpeg
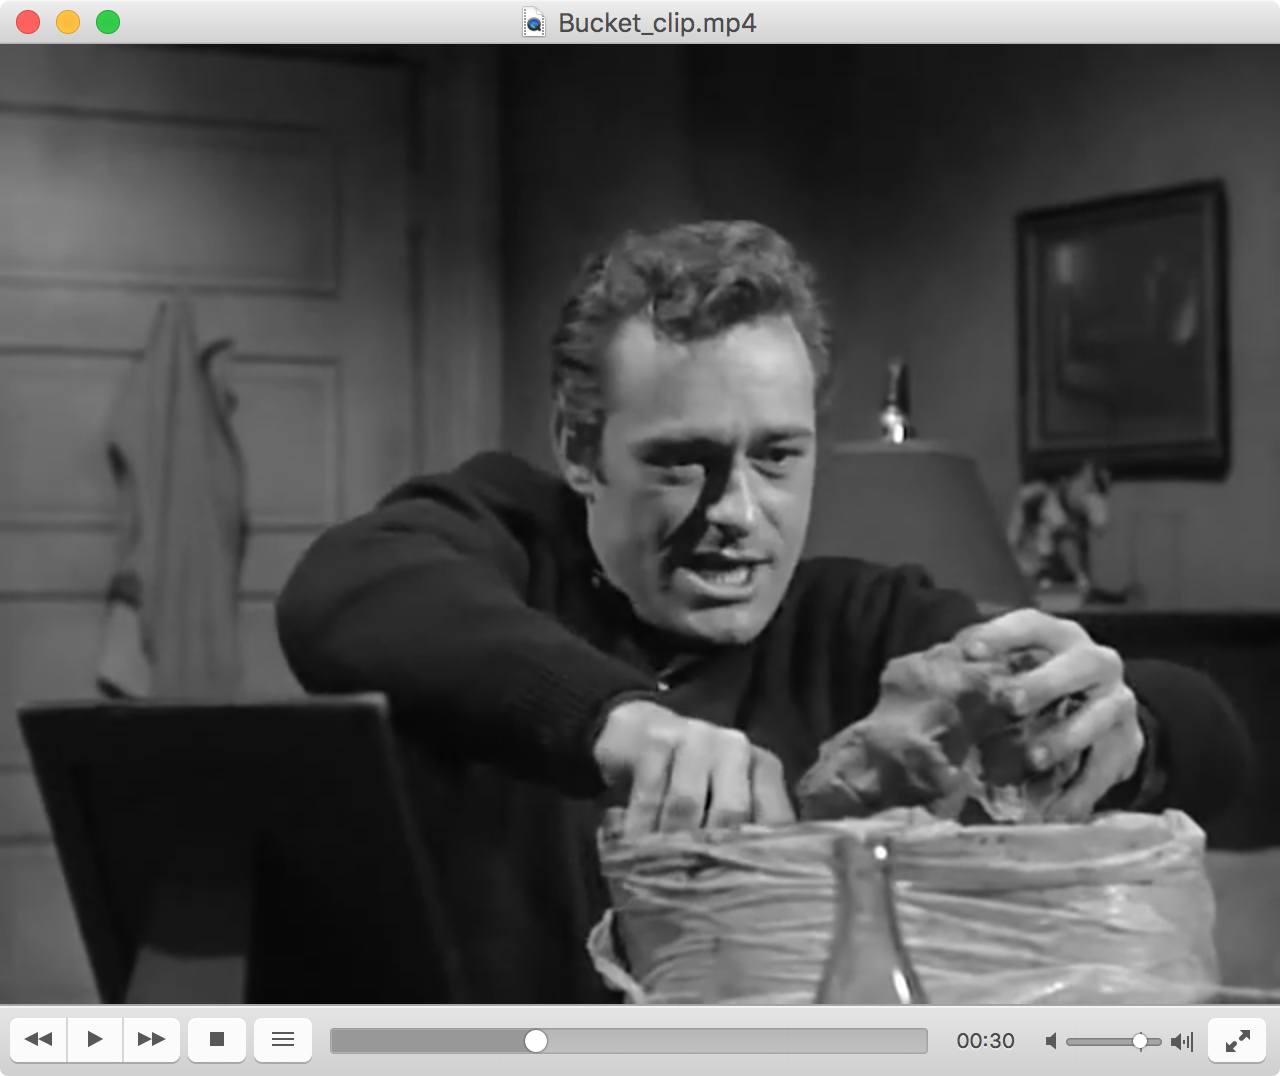
Another useful program is youtube-dl, which allows us to download just about any video from YouTube. Try it with A Bucket of Blood, Roger Corman’s 1959 black comedy about beatnik culture (which happens to be in the public domain). The file will be around 300 MB, so this may take a few minutes. You can substitute a shorter video if you prefer.
youtube-dl https://www.youtube.com/watch?v=PEzoCoIolJ0 --output A_Bucket_of_Blood.mp4

Now view the file’s metadata with ExifTool.
exiftool A_Bucket_of_Blood.mp4

Take a moment to view ExifTool’s man page, which you can also find here. Press q to exit the manual viewer.
man exiftool
Next, we will extract a 90-second segment from the video using FFmpeg. The -ss option specifies start time and -t is the length of our new excerpt. In this case we’re creating a 90-second clip beginning 10 minutes, 11 seconds into the film. This may take a few minutes.
ffmpeg -i A_Bucket_of_Blood.mp4 -ss 00:10:11.0 -t 00:01:30.0 Bucket_clip.mp4

Instead of HH:MM:SS.S notation, we can also specify start time and/or length using seconds. The following command produces the same output as the one above.
ffmpeg -i A_Bucket_of_Blood.mp4 -ss 701 -t 90 Bucket_clip.mp4
When FFmpeg is finished, open Bucket_clip.mp4 in VLC Media Player and see how it turned out. You may notice missing video frames or other errors.
As usual, the command man ffmpeg will display FFmpeg’s manual.
Programming basics in Python (as much as time permits)
To get started using Python, simply enter python3 in the shell.
python3
We’ve just switched from the standard shell to the Python environment, which you can tell at a glance by the “>>>” to the left of your cursor. We’re in what’s known as a language shell or a read-eval-print loop (REPL), in which any commands we enter will be interpreted as Python code. You can leave Python at any time by entering the quit() command.
We’ll begin by assigning some data to variables.
x = 5
y = 5.0
z = "Hello"
If you type x and hit return, you’ll notice the variable’s current value is output on the line below. Trying the same with x+2 will return 7.
x + 2
Output:
7
Note that x + x gives a result of 10, while x + y returns 10.0. That’s because 5 and 5.0 are different data types in Python. The former is an int, or integer, while the latter is a float, or floating point value.
Now try using the + operator on two strings.
z + " world"
Output:
'Hello world'
Note that + is used for two entirely different purposes: adding numbers and concatenating strings. When the same symbol performs multiple tasks in different contexts, it’s described as overloaded.
By the way, you can use single or double quotes to enclose string text in Python. We’ll talk more about this next week.
Next we’ll link a series of values using Python’s list data type. There several ways to represent an ordered sequence of items in Python, but we’ll be using list most frequently.
eu_countries = ['Austria', 'Belgium', 'Bulgaria', 'Croatia', 'Republic of Cyprus', 'Czech Republic', 'Denmark', 'Estonia', 'Finland', 'France', 'Germany', 'Greece', 'Hungary', 'Ireland', 'Italy', 'Latvia', 'Lithuania', 'Luxembourg', 'Malta', 'Netherlands', 'Poland', 'Portugal', 'Romania', 'Slovakia', 'Slovenia', 'Spain', 'Sweden', 'UK']
We can now refer to individual list members using bracket annotation.
eu_countries[3]
The command above returns the string “Croatia,” which is located at index 3. As in most programming languages, we begin counting from 0 when working with ordered data.
If you try to access an out-of-range index value you’ll get an error.
eu_countries[99]
We can also create a subset of a list using Python’s slice notation. The following will return a list containing four items, beginning at index 3 in eu_countries.
eu_countries[3:7]
Leaving one side of the colon blank will include all items on that end of the list.
eu_countries[5:]
eu_countries[:10]
We can also use negative numbers to count backwards from the end of a list. The following will return “UK,” the final string in the list.
eu_countries[-1]
Under the hood, every string in Python is actually a list of individual characters. In the example below, word[7] returns the letter “e,” while word[7:20] returns “establishment.”
word = "antidisestablishmentarianism"
word[7]
word[7:20]
If we need to know the length of a list or string, the len function can tell us.
len(eu_countries)
len(word)
Conditional statements are a fundamental part of all programming languages. We use the if operator to evaluate conditionals.
number = 12
if number == 12:
     print("The value is 12, an integer.")
By adding else, we can tell Python to do something if the conditional isn’t true.
number = 10
if number == 12:
     print("The value is 12, an integer.")
else:
     print("The value is not 12.")
A for loop is a structure that lets us iterate through lists and other data structures so we can refer to each item one at a time.
for country in eu_countries:
    print(country + ' is great.')
Finally, we can create functions to automate repetitive processes. Use the def declaration to start s function definition. The code below will produce the same output as the last example.
def is_great(word):
    return word + ' is great.'

for country in eu_countries:
    print(is_great(country))
In this case we’re not saving much effort, but as we proceed you’ll find that functions will help you write simpler, more readable code.
11. Accessing the shell from Python with the os package (if time permits)
The next section is intended as an instructor demonstration, to be included if time permits.
First, check the length of the film with exiftool. Open a new terminal window and enter the following.
cd /sharedfolder
exiftool A_Bucket_of_Blood.mp4
The file comes to 1:05:57, or 3907 seconds. Extract 10 5-second clips at random and combine them to create a new video.
import os
import random

total_time = 3907
clip_time = 5

def random_start():
    return random.random()*(total_time - clip_time)

os.chdir('/sharedfolder/')

for i in range(5):
    os.system("ffmpeg -i A_Bucket_of_Blood.mp4 -ss " + str(random_start()) + " -t 4 clip" + str(i) + ".ts")

os.system('''ffmpeg -i "concat:clip0.ts|clip1.ts|clip2.ts|clip3.ts|clip4.ts" Bucket_collage.mp4''')
12. Closing Docker
To leave a Docker interactive terminal session and return to your main operating system’s shell, press ctrl + p followed by ctrl + q.
To view all current Docker containers, enter the following command:
docker ps -a
To close and remove a container, use docker rm -f followed by its name, like so:
docker rm -f pcda_ubuntu
To close and remove all current Docker containers, enter the following command:
docker rm $(docker ps -aq)